Many of us remember our childhood with those delicious caramel candies. Today we are going to show you a great recipe to make these candies at home. Even if you don’t recall the old taste of the caramel candies, you will be satisfied from this great candy temptation. Making them is not complicated and it is very quick. All you have to do is to melt the ingredients.
Ingredients:
Powdered sugar – 500g.
Full fat cream – 500ml.
Honey – 120ml.
Butter – 50g.
Vanilla essence.
Directions:
1. Place all of the ingredients into a small pot. If you don’t have powdered sugar, you can use ordinary crystal – it won’t be a very big of a difference. If you prefer to use brown sugar, have in mind that the candies will darken faster if the color is important for you. If you worry about the honey which is allergen or you just don’t like its taste, you can change it with glucose syrup or anything else that is thick and sweet. Of course, you must balance the taste of the future caramel candies.
2. Let the pot sit on a low fire and wait for the ingredients to melt – the primary thing is to melt the butter. This is the interesting part. If you mixed the ingredients inside the pot, now is the moment to stop. Just watch the melting process. If you have a thermometer – watch for the caramel temperature to be around 122-123 °C. If you want the caramel to be darker and more bitter, you can keep the temperature around 125-128 °C. If you don’t have thermometer around you have two options – watch it and decide when it will be done based on the color (you can see some pictures in the web to know what the exact color is), and the second option is to put a caramel drop into water and try to form a small ball with fingers from it – if it is elastic and don’t stick – the caramel is done.
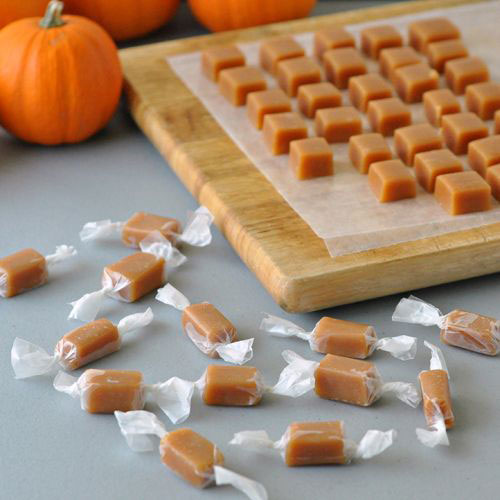
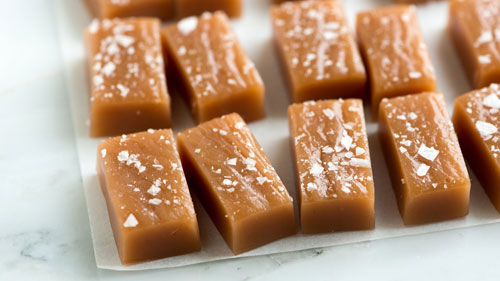
3. Pour the caramel into a rectangular baking form that is covered with cooking paper. You can use any kind of pot that you have around, just make sure that its walls are over 2 cm. To make a good candy, keep the height of the caramel around 1,5 cm and not below 1 cm.
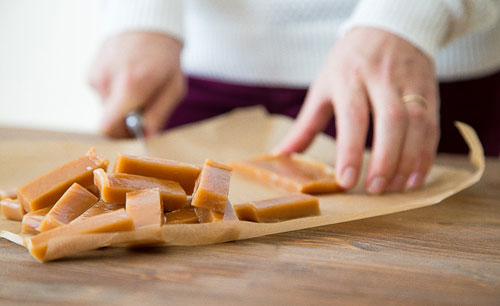
4. Let the caramel for around 3 hours in the fridge. This time should be enough. With wet knife we must slice it and form rectangular pieces – you’ve probably seen this type of caramel candies and know the form. If the caramel is stiffer than expected, sink the knife in hot water for a second. The sliced candies you can decorate by your taste – with powdered sugar, seeds (while the mixture is still hot and unsliced) and even salt – it is modern nowadays. But if it is your first time, we suggest to keep it to the classic.
So, we hope you made a nice and tasty caramel candies with milky taste. Without any doubt, who tried them wanted more and more. If you liked the delicious candies, share the recipe with some friends, so they can try them too.